
Club Owners and club Admins have access to the club’s Settings page, but, only the club Owner can edit the details.
Jump to section:
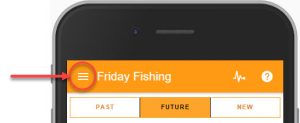
Club Settings page
- Tap the Menu button in the top left.
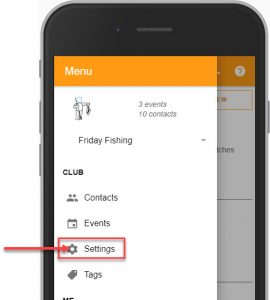
- Select the “Settings” option
Club Settings fields
- Club Name: The club name that will be seen by everyone in the club.
- Club short code: This is created automagically when the club was created and is used in alerts and calendar feeds. The Shortcode cannot be changed.
- Custom logo: Select or set the logo for your club. If your club is already using a logo, use the “REMOVE LOGO” button to remove the logo and then add a new one.
- Club Location, Club County, Club Country: Required fields that tell the system where the club is, and calculate the timezone.
- Time zone: Using the location fields, the system will determine the timezone of your club. If the system defined timezone is not correct, amend it here.
- Description: a short description of the club. Will be displayed when people search for the club.
- Event list URL: The URL (web address) of your clubs “web-feed”. “Open” events will be listed here. If you have embedded your web-feed into your club’s website, then replace this URL with the address of that page, as this URL will be shown in all invitations and reminder Emails.
Event Defaults
Here you can set the defaults for Events that are created – you can override these settings when you create an event:
- Users can see attendees: Select whether people you invite can see other people who have also been invited.
- Reminders sent to Invitees: choose how long before the event date, or the respond-by cut-off date (whichever comes first) reminders will be sent to people who have been invited but not responded.
- Reminders sent to Attendees: choose how long before the event date & time reminders will be sent, but only to people who have accepted their invitation.
- Show on web and iCal feeds: Choose whether the event will be visible on web and iCal feeds. If it is not, then only App users or invitees will be aware of the event (making it a “Closed” event)
Ticketed Events
Set up default ticket types and information collected for each ticket – these will be the default when a ticketed event is created,- but then you can adjust for each event.
- Ticket types: Create types of tickets (e.g. Adult/Child). Each ticket has a Name, Price and a Notes field to explain the ticket type to the purchaser
- Per ticket data: Determine what data you will need to collect from each ticket holder. This can be used for many purposes
Paid Events
Defaults for paid events; only available on Ticketing Pro plans.
- Currency: Choose your currency.
- Enable paid events: When checked, events will be paid events by default
- Enable “offline” payments: If this is not checked, then tickets must be purchased by credit card. When checked, tickets can be ‘sold’ without payment, and ticket purchasers will be sent details of how to pay
- Description: This text will be sent to purchasers telling them how to pay for tickets. (e.g. Bank transfer details)
Theme Colour
- Colour: Select a colour theme from the options.
Advanced
- Generate support key: If you need help from us, sometimes its only possible to really understand the problem if we can see it ourselves. By clicking the “GENERATE” button, you will create a temporary access code that you can give us so that we can get access to your club as if we were you.
- Change Plan: If you want to upgrade, downgrade or add a new module, then select the “PLANS” button (which brings you to the “Plans and Pricing” page on this website).
- Delete this club: If you want to delete everything and start over again, then select the “DELETE CLUB” option. NOTE: This will delete EVERYTHING and cannot be undone: The club, all club Events and all club Contacts will all be deleted.